Barbara stands out as one of Genshin Impact’s most accessible yet deeply underrated characters. As a 4-star Hydro healer, she’s available from the starter banner and has been a staple for countless players since launch, but most never move beyond treating her as a temporary crutch. The reality? Barbara Genshin Impact builds can be optimized to make her not just functional, but genuinely excellent for both casual and endgame content. Whether you’re stuck on a tough boss, need consistent off-field healing, or want to explore Hydro reaction teams, Barbara deserves a serious look. This guide breaks down everything from ability mechanics to advanced team synergies, so you can finally unlock her full potential.
Table of Contents
ToggleKey Takeaways
- Barbara Genshin Impact builds can be optimized to make her a genuinely excellent healer for both casual and endgame Spiral Abyss content when prioritizing Max HP and Healing Bonus stats.
- Her Elemental Skill is her primary healing output and should be leveled to 9, as it provides consistent off-field healing without interrupting your main DPS rotation.
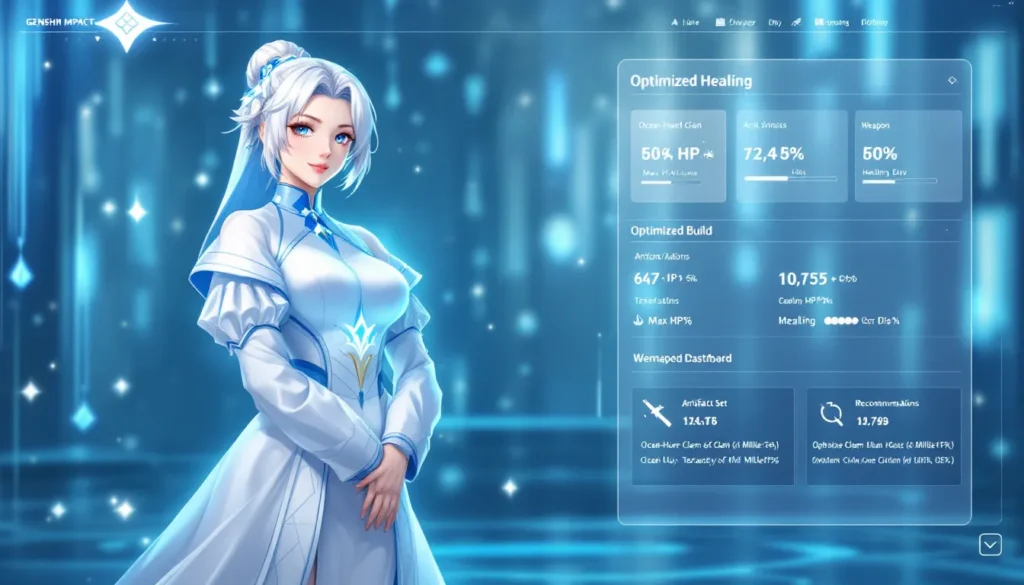
- Ocean-Hued Clam is the best 4-piece artifact set for Barbara, transforming excess healing into damage while maintaining 4,000+ healing per tick at level 90.
- Barbara excels in Freeze teams with characters like Ayaka and Ganyu, where her consistent Hydro application locks enemies in place while her healing keeps your team alive.
- Energy Recharge should target 120-150% depending on weapon choice to ensure her Elemental Burst is available every 12-15 seconds for sustained party healing.
- Avoid common mistakes like prioritizing Attack stats, underleveling her Skill, or forcing her into Vaporize teams without dedicated sub-DPS Hydro applicators like Yelan or Xingqiu.
Who Is Barbara and Why She Matters
Barbara is Mondstadt’s deaconess and the Hydro element’s most reliable healer at early investment. Her kit centers on consistent, party-wide healing without demanding premium 5-star equipment or complex rotations. Unlike other healers, she doesn’t need a specific set of weapons or artifacts to function, a fact that made her the default choice for free-to-play players for years.
Why does Barbara matter now? Meta shifts happen constantly, and Hydro’s role in reactions has evolved dramatically since version 1.0. Barbara fills a niche that pure DPS characters can’t: she applies Hydro consistently while keeping your team alive. That dual utility is far more valuable than players typically realize, especially when building freeze or vaporize teams. She won’t outdamage a dedicated damage dealer, but she won’t hold you back either.
The common misconception is that Barbara “falls off” in late-game content. She doesn’t, she just requires smarter artifact and team choices. Players who optimize Genshin Impact Keqing builds or Raiden Genshin Impact setups apply the same principles to Barbara and see immediate improvements. Her healing output easily handles Spiral Abyss content when paired with appropriate supports and DPS options.
Barbara’s Abilities and Mechanics Explained
Understanding Barbara’s full kit is essential before committing resources. Each ability serves a distinct purpose in her healing toolbox, and subtle mechanics separate functional builds from optimized ones.
Normal Attack: Water Droplet
Barbara’s Normal Attack fires up to 4 Water Droplets in sequence, each dealing Hydro damage based on her Attack stat. This is her least impactful ability and typically sees minimal use in actual combat scenarios. The scaling is low, roughly 40-50% of her Attack per hit at talent level 9, so investing in her Normal Attack talent isn’t a priority.
Where this matters? In pure healer rotations, you might auto-attack between bigger cooldowns, but those hits are incidental. Skip leveling this past talent level 6 unless you’re pushing every possible damage number. Focus elsewhere.
Elemental Skill: Let The Show Begin
Here’s where Barbara’s versatility shines. Let The Show Begin summons Mika, a floating water spirit that circles Barbara for up to 16 seconds. Every 5 seconds, Mika heals the active character for a fixed amount based on Barbara’s HP stat plus a small Attack scaling. The healing is consistent, predictable, and procs even while you’re attacking with another character.
The real strength? This ability applies Hydro regularly without interrupting your main DPS rotation. Swapping to Barbara, casting this, then swapping back takes 2-3 seconds, and Mika handles healing for the next 16 seconds. It’s passive healing at its finest. Talent level 9 is worth the investment because the healing floor gets meaningfully higher, roughly 100+ HP worth of healing per tick on a well-built Barbara.
One caveat: Mika gets removed if Barbara leaves the field after a certain duration without re-casting. Manage uptime by recasting before Mika expires, or rotate your DPS characters quickly enough to keep her on-field.
Elemental Burst: Shining Miracle
Shining Miracle is Barbara’s emergency button. She summons a burst of healing that instantly heals all party members based on her Max HP, then applies continuous healing (similar to her Skill) for up to 15 seconds. The upfront heal is massive, at level 9, you’re looking at 900%+ of her Max HP as instant healing. That’s enough to revive a downed teammate from 0 HP and top off the rest of your party simultaneously.
The continuous healing portion mirrors her Skill, but Burst healing stacks with Skill healing if both are active. Two ticks of healing simultaneously is rare but possible if you time your rotations correctly. This is where Barbara becomes genuinely powerful, proper Burst uptime means constant party healing with minimal attention.
Energy cost is 80, which is moderate for a healer. With proper artifact stats and team energy rotation, her Burst should be available every 12-15 seconds in actual combat.
Passive Talents and Ascension Bonuses
Barbara’s first passive, Glorious Season, heals the active character by 15% of her own healing whenever she uses her Burst. This creates a scaling loop, better healing naturally means better healing. It’s a subtle bonus that adds up over time.
Her second passive, Empathetic, lets the active character gain 15% all elemental damage for 12 seconds after Barbara uses her Elemental Skill. This is underrated. That damage buff applies to your DPS character, making Barbara a subtle off-field support tool alongside healing.
Ascension bonuses are straightforward: she gains HP% and healing bonus at specific milestones. Ascending her to 80/90 gives the largest healing output per unit of resources spent. Ascension 4 unlocks her second passive, which is important for team flexibility.
Best Build for Barbara: Stats, Weapons, and Artifacts
Barbara’s optimal build prioritizes one stat above all others: Max HP. Everything else scales from there, her healing, her damage, even her effectiveness as a Hydro applicator improves with more HP.
Recommended Artifact Sets
Two artifact sets dominate Barbara’s builds at endgame:
Ocean-Hued Clam (4-piece) is the go-to for pure healing output. It grants a 3% healing bonus per artifact piece (12% total) and creates a Clam weapon that stores healing overages. Every 3 seconds, if you’ve healed more than the Clam threshold, it detonates and deals damage equal to the stored overflow (capped at 30,000 damage). This set transforms Barbara from a support tool into a subtle damage contributor, healing 2,000+ per tick for 16+ seconds gets converted into real DPS.
For pure gameplay: go with Clam every time unless you’re building hybrid Hydro damage Barbara (which isn’t common). The healing bonus stacks multiplicatively with other bonuses, making it exceptionally efficient.
Tenacity of the Millelith (4-piece) offers a different angle. It grants 20% HP as the primary stat and gives all party members 20% ATK and 8% physical damage whenever Barbara heals (off-field too). This makes Barbara a subtle ATK buffer, enhancing your main DPS without sacrificing her own healing.
When to use Tenacity? When you need ATK scaling for your DPS characters and you’re comfortable with slightly lower healing numbers. The buff uptime is excellent, but it requires active management to maximize.
2-piece combinations matter if you’re farming artifacts anyway: Clam + Maiden’s Beloved for pure healing numbers, or Tenacity + any energy set if you need faster Burst uptime.
Optimal Weapon Choices
Weapon selection for Barbara hinges on whether you want healing or utility. Her ATK stat is completely irrelevant: every other stat matters proportionally to her build goal.
Thrilling Tales of Dragon Slayers is the best 3-star option by a wide margin. It grants a healing bonus substat and, more importantly, gives the active character 24% ATK buff for 8 seconds when switching to them. This is essentially free damage amplification for your main DPS. Use this weapon unless you need specific energy generation.
Prototype Amber is the 4-star craftable alternative. It provides Energy Recharge (solving Burst uptime issues) and restores HP equal to 4% of Max HP whenever you get a kill or hit enemies with a skill. That healing procs frequently in dungeons and overworld, synergizing beautifully with Ocean-Hued Clam.
Sacrificial Fragments is premium if you have it. Energy Recharge main stat is exceptional, and the passive can reset your Elemental Skill cooldown (25% chance), potentially giving double Skill uptime per rotation. This is overkill for most content but shines in Abyss runs needing maximum healing density.
Everlasting Moonglow (Barbara’s signature 5-star weapon) provides Max HP and a healing bonus. It’s genuinely good but absolutely not required. A 4-star weapon with proper artifacts will match or exceed its practical performance for nearly all content.
Primary and Secondary Stats to Prioritize
Artifact priority, in order:
-
Max HP% (Sands slot): This is your primary stat. Every piece of Barbara’s healing scales from Max HP. Even a 400+ HP sands difference is meaningful over 90 seconds of Abyss combat.
-
Healing Bonus% (Goblet slot): Direct healing amplification. A flat 25%+ healing bonus stacks multiplicatively with set bonuses (Clam, Maiden’s Beloved). This is your second primary stat.
-
Healing Bonus (Circlet slot): Another 25%+ bonus. Two healing bonus sources (Goblet + Circlet) reach 50%, dramatically increasing output.
-
HP% (Secondary stats): Every piece of substats that rolls into HP% is a direct healing increase. Target pieces with 2-3 HP% rolls.
-
Energy Recharge (if using sub-optimal weapons): If you’re using Thrilling Tales instead of an ER weapon, shoot for 120-140% ER total to ensure Burst availability. Energy Recharge becomes a secondary stat focus.
-
Avoid completely: ATK%, DEF%, Physical Damage, Critical Rate/Damage. These stats do virtually nothing for Barbara’s core function.
Optimal artifact distribution: HP% Sands, Healing Bonus Goblet, Healing Bonus Circlet, with HP% and ER dominating substats. This build typically produces 4,000+ healing per Skill tick at level 90, scaling to 8,000+ with Burst active.
Team Compositions and Best Pairings
Barbara’s value multiplies when paired with the right DPS and support characters. Her Hydro application opens specific reaction pathways that define viable team archetypes.
Freeze Reaction Teams
Freeze (Hydro + Cryo) is where Barbara genuinely excels. Characters like Ganyu, Ayaka, or even Shenhe pair beautifully with her consistent Hydro application. The Freeze status locks enemies in place, negating damage entirely, essentially giving your team infinite survivability.
A classic freeze team: Barbara (Hydro applicator/healer) + Ayaka (main DPS) + Kazuha or Sucrose (Anemo buffer) + Shenhe or Rosaria (Cryo support). Barbara’s healing keeps Ayaka alive while applying Hydro for constant Freezes. The Anemo character distributes Elemental Mastery, boosting reaction damage. Shenhe amplifies Cryo damage, making the Freeze itself more relevant as a crowd control tool.
Why this works: Freeze trivializes dangerous enemy mechanics. Enemies that can’t move can’t damage you. Barbara’s healing matters less when enemies are frozen, but her consistent Hydro application becomes the engine driving the reaction.
In practice, this team clears Spiral Abyss easily. Recent patches show Freeze variants clearing 12-3 within time limits, proving the composition’s endgame viability.
Vaporize Support Compositions
Vaporize (Pyro applied first, then Hydro) amplifies Pyro damage by 1.5x (or 2x with proper reaction sequencing). Barbara’s role here is more nuanced, she applies Hydro after your DPS applies Pyro, triggering Vaporize on her Skill or Burst application.
Example setup: Hu Tao (main DPS/Pyro) + Barbara (Hydro applicator/healer) + Zhongli (shield/debuff) + Kazuha (Pyro buffer). Hu Tao applies Pyro with normal attacks, then Barbara’s Skill or Burst triggers Vaporize. Zhongli’s shield removes the need for excessive healing, letting Barbara focus on Hydro application. Kazuha buffs Pyro damage further.
The catch? Vaporize teams trade survivability for damage. Barbara’s healing is essential, but her Hydro application competes with your DPS’s Pyro application. Overloading the field with Hydro wastes Pyro damage potential. These teams require careful attention to Hydro aura management.
These are viable but demand more mechanical skill than Freeze. If you’re comfortable managing Hydro application, Vaporize teams can match or exceed Freeze output on specific bosses.
Mono-Hydro and Alternative Setups
Mono-Hydro (all Hydro team) is niche but valid. Characters like Yelan, Xingqiu, and Kokomi alongside Barbara create a team drowning in off-field Hydro application. This synergizes with Hydro-scaling weapons and allows for reaction flexibility, you can trigger Vaporize, Freeze, or Bloom depending on what you bring as a sub-DPS.
A mono-Hydro team might look like: Barbara (healer) + Yelan (off-field DPS) + Xingqiu (off-field applicator) + Fischl or Kazuha (flex). The three Hydro characters handle healing and damage simultaneously. Fischl adds Electro for Electrocharged reactions, or Kazuha buffs Hydro damage if you prefer pure Hydro scaling.
This is more experimental than meta, but it works in lower-difficulty content and opens interesting team-building opportunities. Barbara in particular makes Mono-Hydro feasible because she’s the only Hydro healer available to free-to-play players.
Alternative angle: Barbara works as a sub-DPS/support in Bloom teams (Hydro + Dendro). She applies Hydro consistently while healing, letting a Dendro applicator trigger Bloom seeds. This is less optimized than using dedicated Bloom vehicles, but it’s viable if you’re short on characters.
Leveling and Ascension Materials
Optimal resource allocation means knowing exactly what Barbara needs to reach maximum efficiency. Some levels matter more than others.
Character Level-Up Requirements
Barbara reaches maximum effectiveness at level 90, where her Max HP and healing bonus are highest. But, the leveling curve demands significant resources past level 80.
Breakdown:
- Level 1-50: Free ascension quest. Requires minimal resources.
- Level 50-60: Ascension 2 unlock. First real resource gate (requires Varunada Lazurite materials from Oceanid).
- Level 60-70: Second ascension requirement. Continued Oceanid farming.
- Level 70-80: Ascension 3 unlock. Scaling accelerates: XP books become expensive.
- Level 80-90: Ascension 4 complete. Final leveling stretch requires over 1 million mora and 46+ blue/green XP books.
Priority ranking:
- 80/90 Barbara is the sweet spot. She gains her second passive at Ascension 4 (Empathetic, the elemental damage buff), and healing output is nearly maxed.
- If resources are tight, stop at 70/80 and ascend to level 3 for immediate passive unlock. You lose ~15% Max HP, but it’s functionally acceptable.
- Don’t stop below 70. Healing output at 60 is noticeably weaker.
Mora requirement: Approximately 3 million mora to go from level 1 to level 90 (including ascensions). Spread this across lower priority characters to maintain a balanced roster.
Talent Book Locations and Schedules
Barbara’s talent books drop from the Forsaken Rift domain in Mondstadt. This domain operates on a rotating schedule:
- Monday/Thursday: Guyun Domain books (Barbara’s materials)
- Tuesday/Friday: Taishan Mansion books (other 4-stars)
- Wednesday/Saturday: Forsaken Rift books (Barbara)
- Sunday: All book types available
Where to focus:
- Elemental Skill (Let The Show Begin): Level this to 9. It’s her primary healing tool and procs frequently. A level 9 Skill doubles healing throughput compared to level 6.
- Elemental Burst (Shining Miracle): Level to 8-9. The upfront heal scaling matters significantly, but diminishing returns hit after level 8.
- Normal Attack: Leave at level 6. It’s irrelevant to her core function.
Total requirements (level 1→9 for Skill and Burst):
- 18 purple talent books (Forsaken Rift)
- 66 green talent books
- 18 Varunada Lazurite slivers/fragments/chunks
- 27 Spectral Hearts (drop from Hydro Hypostasis)
- 18 Crown of Insight (limited resource, only 1 per spiral reset, roughly 6-7 per year)
Spectral Heart farming is the real gate. Hydro Hypostasis is the only source, located southeast of Fontaine. Expect 1-3 drops per weekly run. Budget 4-5 weeks of farming for complete talent maxing.
Recommendation: Prioritize Skill talent first. The healing increase from level 6→9 is immediately noticeable. Use your Crown on either Skill or Burst, both are equally important for a healer.
Advanced Tips and Optimization Strategies
Once Barbara’s stats and talents are locked in, subtle mechanical optimizations separate adequate builds from excellent ones. These micro-adjustments compound over long fights.
Energy Regeneration and Burst Uptime
Barbara’s Elemental Burst has an 80 energy requirement, making Burst uptime critical for sustained healing. Without proper Energy Recharge, you’ll wait 20+ seconds between casts, a lifetime in Abyss combat.
Target 120-140% Energy Recharge depending on weapon choice:
- Prototype Amber users: 100-120% ER (weapon provides built-in recharge).
- Thrilling Tales users: 130-150% ER (weapon has no ER, so artifacts must compensate).
- Sacrificial Fragments users: 100-120% ER (cooldown resets generate additional energy).
How to achieve this without sacrificing HP or Healing Bonus: Use your sand slot for HP% (mandatory), goblet/circlet for Healing Bonus (mandatory), and stack ER in substats on remaining pieces. A well-farmed set will have 2-3 HP% rolls on every piece plus at least one ER roll. This reaches 120% ER naturally while maintaining 30,000+ Max HP.
In-combat energy generation:
- Barbara’s Skill generates 2 energy on cast (low). Pair her with sub-DPS characters that generate party energy (Fischl, Yelan, Kazuha). Their off-field energy particles feed Barbara.
- Elemental Mastery doesn’t affect energy, only Elemental Skill/Burst generation matters.
- On-field time for Barbara should be under 15% total combat duration. You’re rotating through, not staying as main DPS.
Practical rotation: Swap to Barbara, cast Skill (2 energy), swap back. Let your DPS characters’ energy particles feed Barbara. Every 10-15 seconds, you’ll have accumulated 60+ energy. This positions you for frequent Burst casts.
Positioning and Skill Rotation
Barbara’s off-field Skill healing creates positioning requirements. Mika (her spirit) heals the active character on the field. Mismanaging active character swaps wastes potential healing.
Optimal rotation in Abyss:
- Start with your main DPS.
- After 5-8 seconds, swap to Barbara (triggers Skill if off cooldown), immediately swap back.
- Continue DPS while Mika heals for 16 seconds.
- Around the 12-second mark, swap to Barbara again and recast Skill before Mika expires.
- Use Burst only when active character drops below 50% HP or when timing aligns with high-damage enemy attacks.
This rotation keeps consistent Mika uptime while maintaining maximum DPS uptime. Botching timing means 2-3 second windows where Mika expires and you lose healing, forcing you to manually heal with Burst (wastes the healing efficiency of Skill).
Positioning mechanically: Keep Barbara slightly back from melee enemies when she’s active. Her range is limited, and enemies can overwhelm her if she’s in front. Let your shield-carrying support (Zhongli, Diona) tank aggro while Barbara heals from relative safety.
Addressing the Hydro Application Debuff
Here’s a mechanical quirk most guides skip: Barbara’s Hydro application isn’t instantaneous like a DPS Hydro applicator. Her Skill and Burst apply Hydro over multiple ticks as healing hits process. This creates an application “lag” where enemies might cleanse or remove the Hydro aura before you can trigger intended reactions.
This is most problematic in Vaporize teams. If Hu Tao applies Pyro, then Barbara applies Hydro in ticks over 3+ seconds, enemies with cleanse mechanics (Hydro aura cleanses Pyro) can negate Vaporize reactions.
Workarounds:
- In Freeze teams, ignore this entirely. Hydro aura doesn’t cleanse Cryo, so lag doesn’t matter.
- In Vaporize teams, pair Barbara with off-field Hydro applicators (Yelan, Xingqiu) to maintain permanent Hydro aura. Barbara’s Hydro application becomes redundant but still useful.
- Alternatively, use dedicated Hydro on-field DPS (Kokomi, Childe) instead of Barbara in Vaporize. Barbara then handles pure healing without Hydro application pressure.
Optimization: Don’t expect Barbara’s Hydro application to carry Vaporize reaction chains. Treat her as a healer-with-Hydro-benefit rather than a primary applicator. Pair with Yelan or Xingqiu who handle consistent application reliably.
Common Mistakes and How to Avoid Them
Even optimized builds fail when players misallocate priorities or misunderstand Barbara’s mechanical role.
Mistake 1: Prioritizing ATK or Normal Attack talent. Barbara’s Normal Attack scaling is garbage. Every point into Attack or Normal Attack talent is a point wasted. Her damage comes from Burst healing conversion to Ocean-Hued Clam detonations, not from her attacks. Ignore ATK% artifacts and leveling entirely.
Mistake 2: Underleveling her Elemental Skill. Skill is her primary healing output. Leaving it at level 6 instead of maxing to 9 cuts sustained healing by 25-30%. This is noticeable when you face Abyss enemies with consistent damage patterns. Prioritize Skill leveling above all else.
Mistake 3: Using the wrong artifact main stats. Healing Bonus Goblet is mandatory. Some players run HP% Goblet thinking “more Max HP = more healing,” but that’s mathematically inferior. Healing Bonus multiplies her Max HP scaling directly. Always run Healing Bonus on Goblet and Circlet.
Mistake 4: Forcing Barbara into Vaporize teams without sub-DPS support. Barbara’s Hydro application is slow. Hu Tao + Barbara alone can’t maintain consistent Vaporize reactions because Hydro lag cleanse-locks enemies. Always pair with Yelan, Xingqiu, or similar. The problem isn’t Barbara, it’s team composition math.
Mistake 5: Bringing Barbara to fights where healing is irrelevant. Some Abyss chambers punish healers (high-healing-blocked debuffs). Zhongli with shields is superior there. Use good judgment, Barbara shines in enemy-heavy stages, not in one-shot-threat scenarios. Check the enemy lineup before locking her in.
Mistake 6: Not managing Energy Recharge. Running sub-120% ER on Barbara creates 20+ second Burst gaps. This completely breaks her healing availability during damage spikes. Ensure ER is built into every configuration.
Mistake 7: Overcapping Healing Bonus beyond 50%. Healing Bonus scaling hits diminishing returns around 50% (Goblet + Circlet full). Adding more via artifact substats wastes potential HP% rolls. 50% Healing Bonus + max HP% is the mathematically optimal balance.
These mistakes are correctable with one character reset worth of resources. Most players commit to wrong builds through ignorance, not because wrong builds are unavoidable. Understanding the mechanics first saves weeks of farming.
Conclusion
Barbara in Genshin Impact represents a masterclass in accessible character design. She’s not the flashiest or most mechanically demanding healer, but she’s reliable, upgradeable, and genuinely effective when built properly. From Spiral Abyss to exploration, a well-optimized Barbara carries teams that lack premium 5-star supports.
The path forward is clear: prioritize Max HP and Healing Bonus, level her Elemental Skill to 9, farm Ocean-Hued Clam artifacts, and slot her into Freeze or Vaporize teams with characters that synergize with consistent Hydro application. Recent game meta analysis on Game8 shows Barbara still viable in 2026 Abyss, and Japanese gaming coverage from Siliconera has highlighted her role in endgame Hydro teams repeatedly.
If you’re building Barbara for the first time or optimizing an existing build, the framework here covers everything from materials to advanced rotations. Don’t let misconceptions about 4-star healers limit her potential, thousands of Abyss clears have proven that investment pays off. Start with the artifact priority, commit to Skill leveling, and watch her healing output surprise you. Whether you’re progressing through Teyvat or pushing late-game content, Barbara deserves a serious slot in your healing rotation, and detailed Genshin Impact guides across platforms confirm her competitive viability within current meta expectations.