Xiao has always been one of Genshin Impact’s most rewarding, and demanding, damage dealers. As the Vigilant Yaksha, this Anemo polearm user delivers some of the highest burst damage in the game, but only if you understand his mechanics and playstyle. Whether you’re running Spiral Abyss or tackling endgame domains, Xiao’s aggressive aerial assault can carry your team to victory when built correctly. This guide covers everything you need to master Xiao in 2026, from weapon choices and artifact sets to team composition and advanced combat rotations. If you’ve been sleeping on this adeptus or want to optimize your existing build, you’re in the right place.
Table of Contents
ToggleKey Takeaways
- Xiao excels as a self-reliant Anemo DPS character who deals massive burst damage through his Bane of All Evil ability without requiring elemental reactions, making him effective in virtually any team composition.
- Prioritize Primordial Jade Winged-Spear as your signature weapon and Vermillion Hereafter as your artifact set to maximize Xiao’s damage output, while maintaining 130-140% Energy Recharge to ensure consistent burst uptime.
- Master jump canceling and stamina management to fit 11-12 plunges into Xiao’s 15-second burst window, a technique that can increase your damage output by up to 20% through proper execution.
- Pair Xiao with a reliable healer or shielder (such as Zhongli or Bennett) to mitigate his 5% HP drain during burst and maximize damage potential across all content.
- Target 60-70% Crit Rate and 120-150% Crit Damage as baseline stats, ensure your Sands provide ATK% and Goblet provides Anemo Damage Bonus to scale Xiao’s plunge attacks efficiently.
Who Is Xiao and Why He Matters
Xiao is a 5-star Anemo polearm user released during Genshin Impact’s first year and remains one of the most consistent main DPS options across all game content. His kit revolves around his elemental burst, Bane of All Evil, which transforms him into a Yaksha state where his normal attacks become aerial plunges that deal massive Anemo damage. This burst has a relatively short cooldown (12 seconds) and lasts 15 seconds at high talent levels, creating a powerful damage window that feels incredibly satisfying to execute.
What makes Xiao stand out is his self-reliant nature. Unlike many DPS characters, he doesn’t need elemental reactions to deal significant damage, his raw Anemo scaling and plunge multipliers are his primary damage source. This independence means he works in virtually any team composition, but it also means his damage depends heavily on proper investment and positioning. His burst converts normal and charged attacks into plunging attacks automatically, meaning you’ll spend his burst state jumping and diving into enemies, a playstyle that’s both visually stunning and mechanically engaging.
But, Xiao comes with a notable trade-off: Bane of All Evil consumes health during its duration, draining 5% of his max HP every 2 seconds. This self-damage can be mitigated with shields and healing but forces players to plan team composition carefully. Even though this downside, his burst damage and overall DPS ceiling have kept him relevant through countless balance patches and new character releases. If you’re willing to master his aggressive playstyle, Xiao remains one of the most potent choices for endgame content.
Xiao’s Role in Your Team Composition
Xiao functions as your primary damage dealer, a main DPS or sometimes a sub-DPS carry depending on your team’s needs. His role is straightforward: activate his burst, jump relentlessly into enemies, and output massive plunge damage until his 15-second window closes. He doesn’t support teammates, apply consistent elemental application, or enable complex reaction chains. This focused role makes team building around him more flexible than you might think.
Unlike Hu Tao or Alhaitham, Xiao doesn’t require specific elemental supports to unlock his potential. He scales almost purely off ATK and Crit stats, with Anemo damage bonus providing secondary scaling. This means you can pair him with characters chosen for healing, shielding, and crowd control rather than reaction enablers. Your team structure should prioritize keeping Xiao alive during his burst (especially important given the health drain) and generating enough energy to maintain burst uptime.
Xiao’s team slot distribution typically looks like: Xiao (main DPS) + 1 healer/shielder + 1-2 off-field damage dealers or supports. The healer is non-negotiable: characters like Bennett, Zhongli, or Jean keep him alive during the health-drain window. Off-field damage dealers such as Fischl or Albedo provide additional DPS without competing for field time. If you’re using a dedicated shielder like Zhongli, you can afford slightly less healing and more damage flexibility in your remaining slot. The key is maintaining energy generation, survival, and adequate healing, everything else is optimization.
Best Weapons for Maximizing Xiao’s Damage
Xiao’s weapon choice has a direct and dramatic impact on his damage output. Unlike some characters where weapon swaps are marginal, the polearm you equip fundamentally changes his playstyle and scaling. Let’s break down the options.
Polearm Weapons to Prioritize
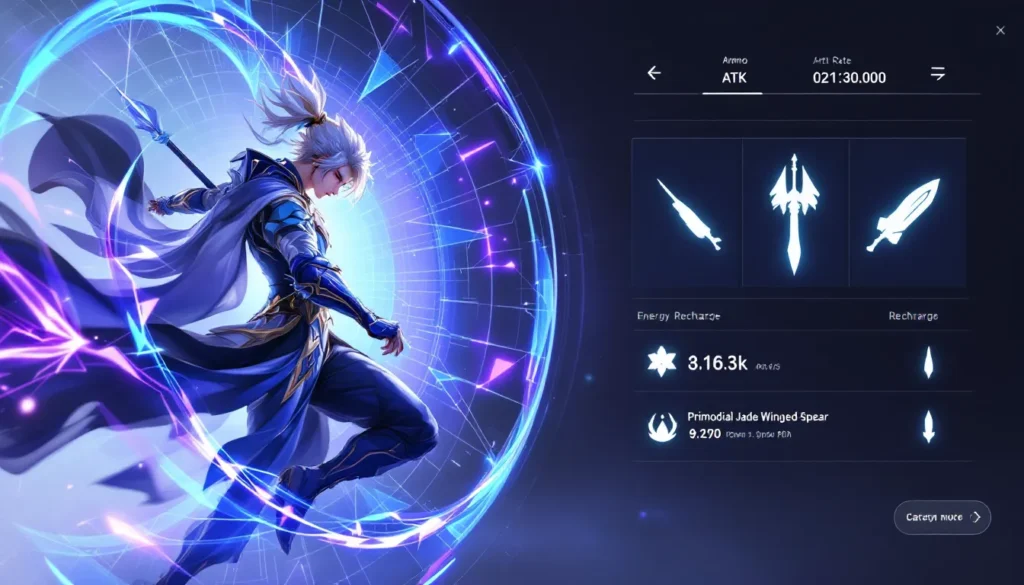
Primordial Jade Winged-Spear is Xiao’s signature weapon and his absolute best-in-slot option. Its passive grants ATK% for normal and charged attacks, stacking up to 7 times with a 10-second duration. Xiao’s plunge attacks during his burst trigger this effect consistently, allowing you to maintain high stacks throughout the damage window. With a max refinement weapon, this translates to roughly 24% more ATK compared to other 5-star polearms, a significant edge in burst output. If you have access to this weapon, use it without hesitation.
Staff of Homa is another premium option that scales off Xiao’s max HP. The passive grants HP% as ATK, making it effective for characters with large health pools. During Xiao’s burst, when his health drops from self-damage, Staff of Homa actually becomes more powerful due to the HP scaling. This weapon trades some raw ATK for survivability and is particularly strong if you’re running Xiao without a dedicated healer (though that’s not recommended).
Calamity Queller functions similarly to Primordial Jade Winged-Spear with its ATK% stacking mechanic. It’s slightly behind Jade Spear in raw damage but remains an excellent 5-star choice, particularly if you’re playing Xiao in quickswap or support roles where his burst uptime is lower.
Deathmatch is a solid 4-star alternative that provides Crit Rate and ATK% based on enemy count. In multi-enemy scenarios like Spiral Abyss, Deathmatch performs admirably and bridges the gap between free options and premium 5-star weapons.
Free-to-Play Alternatives
Starglitter is the f2p meta polearm for Xiao. You obtain it through the Paimon’s Bargains shop (Battle Pass), and its Crit Rate substat combined with its ATK% passive make it competitive with 4-star gacha weapons. Refinements are relatively easy to acquire, pushing its effectiveness even higher. For completely free-to-play players, Starglitter is your target weapon.
Favonius Lance helps with energy generation but sacrifices ATK scaling, making it suboptimal for Xiao unless you’re running a specific low-investment support build.
Crescent Pike was Xiao’s go-to before Starglitter’s release. While it still works, Starglitter’s Crit Rate makes it the superior f2p choice in modern builds. Pike’s physical damage scaling doesn’t benefit Xiao’s Anemo plunges, limiting its upside.
The weapon hierarchy is clear: 5-star signature weapon > other 5-star polearms > Starglitter/Deathmatch > Pike/Favonius. Your specific choice depends on refinement levels and what you’ve already pulled, but in all cases, prioritizing ATK% and Crit Rate is the winning strategy.
Artifact Sets and Stat Priority
Artifact selection is where Xiao’s optimization truly shines. Unlike characters with flexible set requirements, Xiao has one dominant set that overshadows alternatives, plus secondary options for niche situations.
Optimal Artifact Combinations
Vermillion Hereafter (VH) is Xiao’s primary artifact set, released in Version 3.0. This 4-piece set grants ATK% and scales up plunge damage through a passive that increases elemental burst damage when you enter the burst state. The 2-piece bonus alone (18% ATK) makes it competitive, but the 4-piece effect is where its power lies: each plunge attack during Xiao’s burst extends the burst duration and increases plunge damage. This creates a snowball effect where longer burst windows lead to more plunges, further increasing damage. At high stacks, this set can match or exceed 4-piece Gladiator’s Finale from earlier patches.
Gladiator’s Finale remains relevant as a secondary option, especially if you’re using an older build. The 4-piece bonus (ATK% to normal attacks) scales all of Xiao’s auto-attack plunges, though Vermillion Hereafter’s burst-specific scaling is mathematically superior. Many experienced players still use Gladiator’s because they’ve invested artifact resin into it, and the return is diminishing compared to farming entirely new sets.
Shimenawa’s Reminiscence can work as a stopgap while farming better pieces, but its burst cost mechanic (consumes energy for ATK) directly conflicts with Xiao’s energy needs during his burst, making it mechanically awkward.
The meta consensus from community theorycrafters and tier list discussions on Game8 strongly favors Vermillion Hereafter for new Xiao builds. If you’re starting fresh, farm the Vermillion domain (Oublet of Maidenveil in Fontaine).
Main and Substat Targets
Once you’ve settled on Vermillion Hereather, artifact selection becomes a numbers game:
Sands slot: ATK% primary stat. This is non-negotiable, it’s your primary source of ATK scaling on artifacts.
Goblet slot: Anemo Damage Bonus primary stat. While ATK% is viable, Anemo Damage scales your plunges more efficiently once you have baseline ATK covered. Run Anemo Damage on your goblet.
Circlet slot: Crit Rate or Crit Damage, depending on your current ratio. Aim for 60-70% Crit Rate and 120-150% Crit Damage as baseline targets. If you’re using Deathmatch or have Crit Rate subs everywhere, you can prioritize Crit Damage circlets.
Substat Priority: Crit Rate > Crit Damage > ATK% > Elemental Mastery (dump this). Once you hit your Crit Rate/Damage targets, stack ATK% from whatever pieces have it. Elemental Mastery is completely wasted on Xiao: if a piece rolls into it, you’re eating damage loss.
ER (Energy Recharge) Thresholds: This is critical and often overlooked. Xiao needs enough ER to burst on cooldown without relying entirely on his team. The minimum viable ER is 120% with an external battery (like Zhongli with a 4-piece Tenacity), but 130-140% ER is safer for comfort in real combat. Test your actual energy gen in domains before committing to a build.
A sample endgame Xiao: 2000+ ATK, 70% Crit Rate, 140% Crit Damage, 130% ER. These numbers enable consistent burst rotations and respectable damage without overthinking it.
Talent Leveling and Skill Rotation
Talent priority for Xiao is straightforward because his damage concentrates heavily in one skill:
Burst > Normal Attack > Skill (Elemental Skill)
Your burst is your damage window and should be leveled first to 8-9 and eventually to 10 once you have crowns available. This increases both the multipliers on plunge attacks and the burst duration, directly multiplying your DPS. Normal attack talent is your secondary priority because during burst, your normal attacks transform into plunging attacks, the scaling applies directly. Elemental skill is your utility tool for repositioning and energy gain but contributes minimal damage, so it’s your dump stat talent.
The typical progression is: Crown the burst → Level normal attacks to 9 → Level skill to 8 → Crown normal attacks if min-maxing. In practice, most endgame players run Burst 10 / Normal 9 / Skill 8.
Your combat rotation during active play is deceptively simple:
Setup Phase (Before Burst):
- Use your support’s abilities to apply buffs or generate energy.
- If running a healer, keep Xiao’s health high (burst will drain it).
- Switch to Xiao and use his elemental skill for repositioning and instant energy gain.
- Position Xiao where he has clear aerial space for plunges.
Burst Phase (Bane of All Evil Active):
- Activate burst, Xiao transforms and gains pluinge attack scaling.
- Jump and plunge into enemies. Charged plunges (hold jump) deal higher damage but consume stamina.
- Use stamina efficiently: spam standard jumps in open areas but charged plunges on grouped enemies.
- Ride the burst duration: if enemies die early, you can swap off and reset.
- In longer fights, manage the 5% HP drain by staying grouped with your healer.
Downtime Phase (After Burst):
- Swap to supports to build energy and DPS while burst cooldown runs.
- Use off-field damage dealers to maintain momentum.
- Once burst is ready again (roughly 12 seconds), switch back to Xiao for another rotation.
The mental model is: 15 seconds of pure damage output every ~27 seconds (12-second cooldown + support rotation time). Maximize what you do during those 15 seconds, proper positioning, stamina management, and enemy grouping directly translate to higher burst damage.
Team Synergies and Support Characters
Xiao’s team flexibility is actually one of his greatest strengths. Unlike reaction-dependent DPS, he works with almost any support roster. The key is satisfying three functional roles: sustain, energy generation, and off-field damage. Here’s how to build around him.
Energy Management Strategies
Energy is Xiao’s primary constraint. His burst costs 70 energy (standard), and during downtime, he needs teammates to feed him particles. Unlike characters with passive energy generation, Xiao relies entirely on elemental skills for energy, his normal attacks gain energy slowly. This means your supports must have frequent elemental skill cooldowns.
Cryo/Hydro battery options like Rosaria or Mika can generate 6+ particles from their skill cooldown. Pairing these with Xiao ensures he bursts on cooldown in most scenarios. Alternatively, Electro batteries like Fischl (with Aggravate) or Nahida can battery while providing damage, creating a self-sufficient core.
Energy Recharge Requirement: This depends heavily on team composition. With a dedicated elemental battery (same element), Xiao needs roughly 120-130% ER. With off-element supports, bump this to 140-160% ER. If you’re running zero batteries, you’re handicapping yourself, always pair Xiao with at least one skill that generates particles frequently.
Favonius weapons on teammates are underrated. If your healer runs Favonius Lance or Codex, their Crit Rate procs feed Xiao additional energy, reducing your ER requirement. This is the hidden optimization most casual players miss.
Best Support Pairings
Zhongli is Xiao’s premier support and arguably overqualified for the role. His shield negates the need for healing (the 5% HP drain becomes irrelevant behind a Zhongli shield), and his Universal Resistance Shred synergizes with every DPS character. With Zhongli, Xiao becomes a pure damage machine, no healing or defensive stats needed. The downside: Zhongli is a 5-star limited character. If you own him, build him with 4-piece Tenacity of the Millelith for 20% ATK buff to Xiao.
Bennett offers ATK buff and healing, two of Xiao’s needs. His burst applies Pyro off-field, which doesn’t interfere with Xiao’s Anemo. Pair Bennett with 4-piece Noblesse Oblige to maximize ATK buff uptime. The slight Pyro aura isn’t a problem for Xiao: he doesn’t rely on elemental reactions.
Fischl provides off-field Electro DPS through her summon while generating energy particles. With Aggravate reactions (added in Genshin 3.0), Fischl can deal significant damage independently. This pairs excellently with Xiao because you’re running her for her personal damage, not to enable Xiao’s reactions. A4 level investement on Fischl and 4-piece Thundering Fury lets her dish out respectable sub-DPS numbers.
Jean is Xiao’s elemental kindred. Both are Anemo and can share set bonuses like Viridescent Venerer. Jean’s elemental skill generates particles while her burst heals and cleanses. She’s particularly strong in multi-enemy Abyss chambers where her healing spreads across multiple hits. But, she doesn’t offer ATK buffing, making her more of a utility pick than Bennett or Zhongli.
Mika is a relatively new Cryo support with built-in battery generation and ATK speed buff. He provides energy, sustain through healing, and ATK speed (which Xiao values for faster plunge rotations). If you have Mika, he’s genuinely competitive with premium supports.
Example team compositions:
- Budget Comfort: Xiao / Zhongli / Fischl / Kokomi (shield, damage, healing)
- Budget DPS: Xiao / Bennett / Fischl / Mika (ATK buff, battery, damage)
- Pure F2P: Xiao / Barbara / Fischl / Sucrose (healer, battery, CC)
The first two slots are generally your DPS + shielder or healer. Slots 3-4 fill with off-field damage (Fischl, Albedo, Nahida) and whatever remaining utility you need.
Common Mistakes to Avoid
Even well-built Xiaogenius can stumble on execution. Here are the frequent pitfalls that tank his damage:
Insufficient ER: Rolling ER sands instead of ATK sands, or building pure damage stats with no regard to energy. You’ll burst once, then have long downtime waiting for energy. Test your actual ER requirement in Domains, don’t guess based on guides alone, as team composition affects energy gen dramatically.
Charged plunge spam in burst: Charged plunges deal more damage per hit but cost stamina. In a 15-second burst window, you can fit roughly 8-10 plunges depending on attack speed and enemy positioning. Spam charged plunges and you’ll starve stamina mid-burst, losing plunges entirely. Use charged plunges selectively on large enemies: standard plunges are better for consistent DPS.
Neglecting to group enemies: Xiao’s damage is directional and single-target. If enemies are spread, his plunges hit fewer targets. Use crowd control supports like Kazuha, Sucrose, or Venti to group enemies before Xiao’s burst. Xiao + grouped enemies = 3x burst damage vs. spread. This is massive.
Building pure damage with zero sustain: Zhongli’s popularity has made people forget Xiao has a 5% HP drain. Without healing or shields, you’ll hit low HP and lose burst time playing defensively. Always, always, pair Xiao with healing or shielding. A Kokomi with Tenacity or a Bennett with Noblesse is not negotiable for casual content.
Wrong artifact set choices: Players still farm Gladiator when Vermillion Hereather exists. Or worse, they run Shimenawa’s Reminiscence, which actively conflicts with burst playstyle. Double-check your set bonuses match Xiao’s burst-centric mechanics.
Over-investing in Elemental Mastery: Xiao doesn’t trigger reactions consistently. EM is a dead stat for him. If you roll EM on artifacts, consider them failed pieces and re-farm.
Ignoring Crit thresholds: 40% Crit Rate Xiao feels terrible because 60% of your plunges miss crits. Reach 60%+ Crit Rate before prioritizing other stats. This is non-negotiable for consistent damage feels.
These mistakes are common enough that they’ve spawned entire Reddit threads of players wondering why their Xiao “feels weak.” In reality, weak Xiaobuilds are usually weak on one of these fronts, usually ER or Crit Rate.
For comprehensive tier list comparisons and meta analysis, Twinfinite’s character guides offer solid secondary perspectives on build priorities alongside this guide.
Advanced Combat Tactics and Rotations
Once you’ve nailed the basics, advanced tactics separate carried games from clean clears. These techniques require practice but yield massive damage multipliers.
Jump Canceling: This is the core technique for Xiao optimization. After each plunge, you’re in the air briefly before Xiao recovers. By tapping jump again immediately, you cancel the recovery animation and can plunge again faster. This reduces animation time and compresses more plunges into your 15-second window. Proper jump canceling can fit 11-12 plunges in burst vs. 9-10 lazy plunges. That’s a 20% DPS increase from execution alone.
Stamina Management: Each plunge uses stamina (including standard attacks while airborne). Charged plunges use more. Manage stamina by reading enemy positioning: if enemies are grouped, unleash charged plunges. If spread, use standard plunges to preserve stamina for repositioning. On large enemies like Liyue bosses, front-load charged plunges early burst when stamina is full, then transition to stamina-cheap rotations later.
Precision Positioning: Xiao’s damage is directional. Plunges from directly above the enemy’s hitbox deal more damage than glancing angles. Against tall enemies (Lawachurls, Ruin Hunters), position Xiao above the target before initiating the plunge. Against short enemies, plunge straight down. This micro-positioning adds 5-10% damage through better hitbox connection.
Elemental Skill Weaving: Between burst windows, use Xiao’s elemental skill for repositioning. The skill has low cooldown and generates energy. On character swap rotations (where you use off-field teams while Xiao waits), you can skill + swap, allowing supports to battery Xiao while he’s off-field. In tighter rotations (pure Xiao + healer), skill is your repositioning tool.
Rotation Examples:
Mono Anemo Rotation (Xiao + Healer + 2x Off-Field):
- Fischl skill → Bennett burst (ATK buff) → Xiao burst → Jump-cancel 11+ plunges → Swap to Fischl → Fischl attacks/reposition → Bennett burst (if ready) → Swap back to Xiao for burst #2.
- Total rotation time: ~25 seconds. Burst comes off cooldown every ~12 seconds, so you get overlapping burst windows with 2+ rotations per Abyss chamber.
Zhongli Shield Rotation (Xiao + Zhongli + 2x Off-Field):
- Zhongli shield → Fischl burst (or support setup) → Xiao burst → Uninterrupted plunging for full 15 seconds (no healing needed) → Swap to supports → Return to burst.
- The advantage: no healing needed, so your supports are pure off-field damage.
Venti Grouping Rotation (Xiao + Venti + Healer + Flex):
- Venti burst (groups enemies) → Bennett or Kokomi (healing/buff) → Xiao burst on grouped enemies (damage is concentrated) → Burst for full 15 seconds → Repeat.
- This rotation focuses on enemy grouping to maximize plunge coverage.
High-level Abyss clears often use the Zhongli version for pure damage output, while open-world and overworld farming uses simpler Bennett/Jean rotations for comfort. Test each in Spiral Abyss, the rotation that feels smooth to you is usually the right choice.
Damage Ceiling: Ceiling Xiao builds (R5 Jade Spear, Vermillion Hereather with perfect substats, crowned talents, stacked supports) deal 400K+ single-burst damage against weak enemies and 150-200K per burst against endgame bosses like 12-3-1 (Abyss Herald). These are numbers from RPG Site’s damage calculations and represent the theoretical max with frame-perfect rotations and ideal conditions. Your practical damage will be 70-80% of ceiling depending on player skill and enemy RNG.
Conclusion
Xiao remains one of Genshin Impact’s most rewarding characters to master in 2026. His aggressive playstyle, straightforward build path, and consistent damage output make him an excellent investment for both casual and competitive players. The key to unlocking his potential lies in three pillars: sufficient Energy Recharge to maintain burst uptime, proper artifact and weapon optimization through Vermillion Hereather and polearm selection, and team composition that prioritizes sustain and off-field damage.
From weapon choices like Primordial Jade Winged-Spear down to execution details like jump canceling and stamina management, every layer of Xiao optimization feeds into stronger performance. Start with the fundamentals, stable ER, Vermillion Hereather artifacts, a healer or shielder, then gradually layer in advanced tactics as you grow comfortable. Whether you’re clearing Spiral Abyss or farming artifact domains, Xiao’s Yaksha form will cut through content when built with purpose.
The Genshin Impact meta shifts with each patch and character release, but Xiao’s core identity as a self-reliant burst DPS ensures his relevance stays strong. Master his playstyle now and you’ll be equipped for whatever Teyvat throws at you.